Android编程笔记(六):Navigation UI
- 将navigation controller与Navigation UI组件集成
- Top app bar
- Tie destinations to menu items
- Add a navigation drawer
- Bottom navigation
- Listen for navigation events
- References:
将navigation controller与Navigation UI组件集成
The Navigation component includes a NavigationUI class. This class contains static methods that manage navigation with various navigational UI components, including:
- top app bar
- navigation drawer
- bottom navigation
To set up a navigation controller with various navigational UI components, The common steps are:
- add the navigational UI component to the activity layout
- create a
AppBarConfigurationwith one or more top level destinations - setup the view with the navigation controller &
AppBarConfigurationby calling method likeView.setupWithNavController(navController, appBarConfiguration)
Top app bar
The top app bar provides a consistent place along the top of your app for displaying information and actions from the current screen.
The key functions of the app bar are as follows:
- Dedicated space for giving your app an identity and indicating the user’s location in the app.
- Predictable access to important actions, such as search.
- Support for navigation and view switching, using tabs or menus.
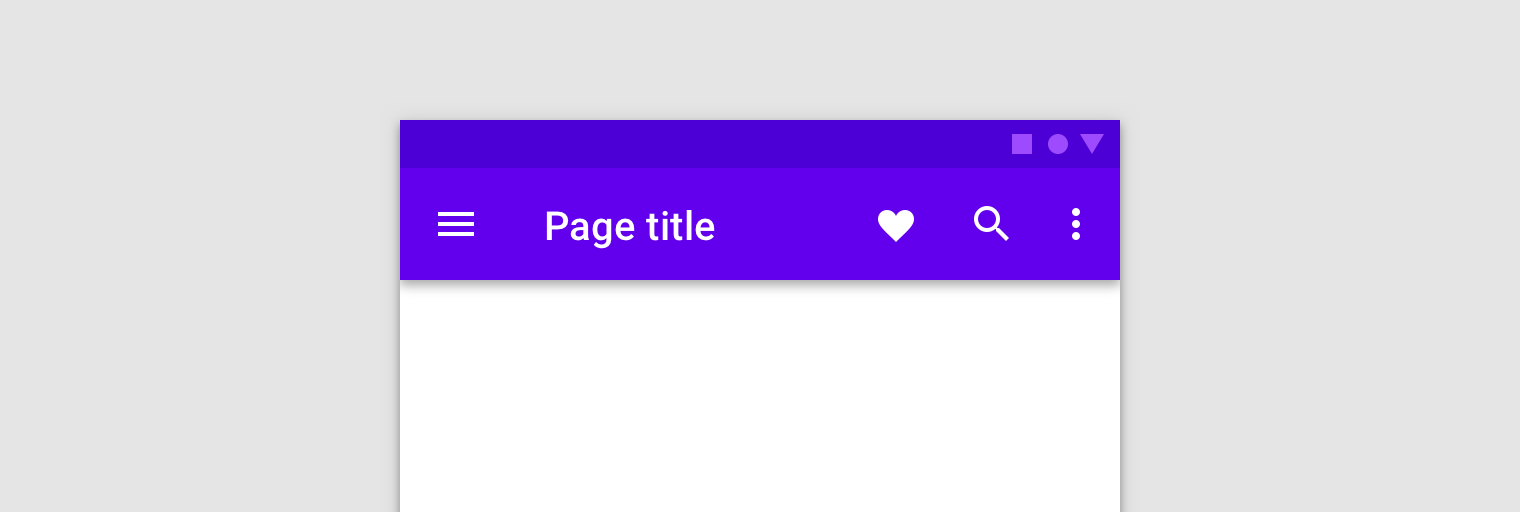
Figure 1. A screen displaying a top app bar.
NavigationUI contains methods that automatically update content in your top app bar as users navigate through your app. For example, NavigationUI uses the destination labels from your navigation graph to keep the title of the top app bar up-to-date.
<navigation>
    <fragment ...
              android:label="Page title">
      ...
    </fragment>
</navigation>
NavigationUI provides support for the following top app bar types:
Differences between Widget Toolbar, App ActionBar, AppCompat Toolbar & AppCompat ActionBar
Differences between Widget Toolbar & App ActionBar
Widget Toolbar is a generalization of action bars for use within application layouts. While an action bar is traditionally part of an Activity’s opaque window decor controlled by the framework, a Toolbar may be placed at any arbitrary level of nesting within a view hierarchy. An application may choose to designate a Toolbar as the action bar for an Activity using the setSupportActionBar() method.
App ActionBar is a primary toolbar within the activity that may display the activity title, application-level navigation affordances, and other interactive items.
The action bar may be represented by any Toolbar widget within the application layout. The application may signal to the Activity which Toolbar should be treated as the Activity’s action bar.
Differences between native version of Toolbar & AppCompat version of Toolbar (or native ActionBar vs AppCompat ActionBar)
Native version of Widget Toolbar & App ActionBar
All activities that use the default theme have an ActionBar as an app bar. App bar features are added to the native ActionBar over various Android releases. As a result, the native ActionBar behaves differently depending on what version of Android a device is using.
AppCompat version of Toolbar & ActionBar
On the other hand, features are added to the AndroidX AppCompat library’s version of Toolbar, which means those features are available on devices that use the AndroidX libraries. Using the AndroidX library’s toolbar to implement your activities’ app bars makes your app’s behavior consistent across the widest range of devices.
For more information on app bars, see Set up the app bar.
AppBarConfiguration
NavigationUI uses an AppBarConfiguration object to manage the behavior of the Navigation button in the upper-left corner of your app’s display area. The Navigation button’s behavior changes depending on whether the user is at a top-level destination.
A top-level destination is the root, or highest level destination, in a set of hierarchically-related destinations. Top-level destinations do not display an Up button in the top app bar because there is no higher level destination. By default, the start destination of your app is the only top-level destination.
When the user is at a top-level destination, the Navigation button becomes a drawer icon ![]() if the destination uses a
if the destination uses a DrawerLayout. If the destination doesn’t use a DrawerLayout, the Navigation button is hidden. When the user is on any other destination, the Navigation button appears as an Up button ![]() . To configure the Navigation button using only the start destination as the top-level destination, create an
. To configure the Navigation button using only the start destination as the top-level destination, create an AppBarConfiguration object, and pass in the corresponding navigation graph, as shown below:
val appBarConfiguration = AppBarConfiguration(navController.graph)
In some cases, you might need to define multiple top-level destinations instead of using the default start destination. Using a BottomNavigationView is a common use case for this, where you may have sibling screens that are not hierarchically related to each other and may each have their own set of related destinations. For cases like these, you can instead pass a set of destination IDs to the constructor, as shown below:
val appBarConfiguration = AppBarConfiguration(setOf(R.id.main, R.id.profile))
Create a Toolbar
To create a Toolbar with NavigationUI:
1) first define the bar in your main activity, as shown:
<LinearLayout>
    <androidx.appcompat.widget.Toolbar
        android:id="@+id/toolbar" />
    <androidx.fragment.app.FragmentContainerView
        android:id="@+id/nav_host_fragment"
        ... />
    ...
</LinearLayout>
2) Next, call setupWithNavController() from your main activity’s onCreate() method, as shown in the following example:
override fun onCreate(savedInstanceState: Bundle?) {
    setContentView(R.layout.activity_main)

    ...

    val navController = findNavController(R.id.nav_host_fragment)
    val appBarConfiguration = AppBarConfiguration(navController.graph)
    findViewById<Toolbar>(R.id.toolbar)
        .setupWithNavController(navController, appBarConfiguration)
}
Note: When using a Toolbar, Navigation automatically handles click events for the Navigation button, so you do not need to override onSupportNavigateUp().
Include CollapsingToolbarLayout
To include a CollapsingToolbarLayout with your Toolbar:
1) first define the Toolbar and surrounding layout in your activity, as shown below:
<LinearLayout>
    <com.google.android.material.appbar.AppBarLayout
        android:layout_width="match_parent"
        android:layout_height="@dimen/tall_toolbar_height">

        <com.google.android.material.appbar.CollapsingToolbarLayout
            android:id="@+id/collapsing_toolbar_layout"
            android:layout_width="match_parent"
            android:layout_height="match_parent"
            app:contentScrim="?attr/colorPrimary"
            app:expandedTitleGravity="top"
            app:layout_scrollFlags="scroll|exitUntilCollapsed|snap">

            <androidx.appcompat.widget.Toolbar
                android:id="@+id/toolbar"
                android:layout_width="match_parent"
                android:layout_height="?attr/actionBarSize"
                app:layout_collapseMode="pin"/>
        </com.google.android.material.appbar.CollapsingToolbarLayout>
    </com.google.android.material.appbar.AppBarLayout>

    <androidx.fragment.app.FragmentContainerView
        android:id="@+id/nav_host_fragment"
        ... />
    ...
</LinearLayout>
2) Next, call setupWithNavController() from your main activity’s onCreate method, as shown below:
override fun onCreate(savedInstanceState: Bundle?) {
    setContentView(R.layout.activity_main)

    ...

    val layout = findViewById<CollapsingToolbarLayout>(R.id.collapsing_toolbar_layout)
    val toolbar = findViewById<Toolbar>(R.id.toolbar)
    val navHostFragment =
        supportFragmentManager.findFragmentById(R.id.nav_host_fragment) as NavHostFragment
    val navController = navHostFragment.navController
    val appBarConfiguration = AppBarConfiguration(navController.graph)
    layout.setupWithNavController(toolbar, navController, appBarConfiguration)
}
Action bar
To add navigation support to the default action bar:
1) call setupActionBarWithNavController() from your main activity’s onCreate() method, as shown below.
Note: you need to declare your AppBarConfiguration outside of onCreate(), since you also use it when overriding onSupportNavigateUp():
private lateinit var appBarConfiguration: AppBarConfiguration

...

override fun onCreate(savedInstanceState: Bundle?) {
    ...

    val navHostFragment =
        supportFragmentManager.findFragmentById(R.id.nav_host_fragment) as NavHostFragment
    val navController = navHostFragment.navController
    appBarConfiguration = AppBarConfiguration(navController.graph)
    setupActionBarWithNavController(navController, appBarConfiguration)
}
2) Next, override onSupportNavigateUp() to handle Up navigation:
override fun onSupportNavigateUp(): Boolean {
    val navController = findNavController(R.id.nav_host_fragment)
    return navController.navigateUp(appBarConfiguration)
            || super.onSupportNavigateUp()
}
Support app bar variations
Adding the top app bar to your activity works well when the app bar’s layout is similar for each destination in your app. If, however, your top app bar changes substantially across destinations, then consider removing the top app bar from your activity and defining it in each destination fragment, instead.
As an example, one of your destinations may use a standard Toolbar, while another uses an AppBarLayout to create a more complex app bar with tabs, as shown in figure 2.

Figure 2. Two app bar variations. On the left, a standard Toolbar. On the right, an AppBarLayout with a Toolbar and tabs.
For more information on how to support app bar variations, see Support app bar variations.
Tie destinations to menu items
NavigationUI also provides helpers for tying destinations to menu-driven UI components. NavigationUI contains a helper method, onNavDestinationSelected(), which takes a MenuItem along with the NavController that hosts the associated destination. If the id of the MenuItem matches the id of the destination, the NavController can then navigate to that destination.
If your menu was created as an XML resource file, you can associate the menu items with destinations by matching the id of the MenuItem to the id of the destination. As an example, the XML snippets below define a menu item and a destination with a common id as details_page_fragment:
<?xml version="1.0" encoding="utf-8"?>
<navigation xmlns:app="http://schemas.android.com/apk/res-auto"
    xmlns:tools="http://schemas.android.com/tools"
    xmlns:android="http://schemas.android.com/apk/res/android"
    ... >

    ...

    <fragment android:id="@+id/details_page_fragment"
         android:label="@string/details"
         android:name="com.example.android.myapp.DetailsFragment" />
</navigation>
<menu xmlns:android="http://schemas.android.com/apk/res/android">

    ...

    <item
        android:id="@+id/details_page_fragment"
        android:icon="@drawable/ic_details"
        android:title="@string/details" />
</menu>
Alternatively, if your menu was added programmatically via the Activity’s onCreateOptionsMenu(), for example, you can associate the menu items with destinations by overriding the Activity’s onOptionsItemSelected() to call onNavDestinationSelected(), as shown in the following example:
override fun onOptionsItemSelected(item: MenuItem): Boolean {
    val navController = findNavController(R.id.nav_host_fragment)
    return item.onNavDestinationSelected(navController) || super.onOptionsItemSelected(item)
}
Now, when a user clicks the details_page_fragment menu item, the app automatically navigates to the corresponding destination with the same id.
Add a navigation drawer
The navigation drawer is a UI panel that shows your app’s main navigation menu. The drawer appears when the user touches the drawer icon ![]() in the app bar or when the user swipes a finger from the left edge of the screen.
in the app bar or when the user swipes a finger from the left edge of the screen.
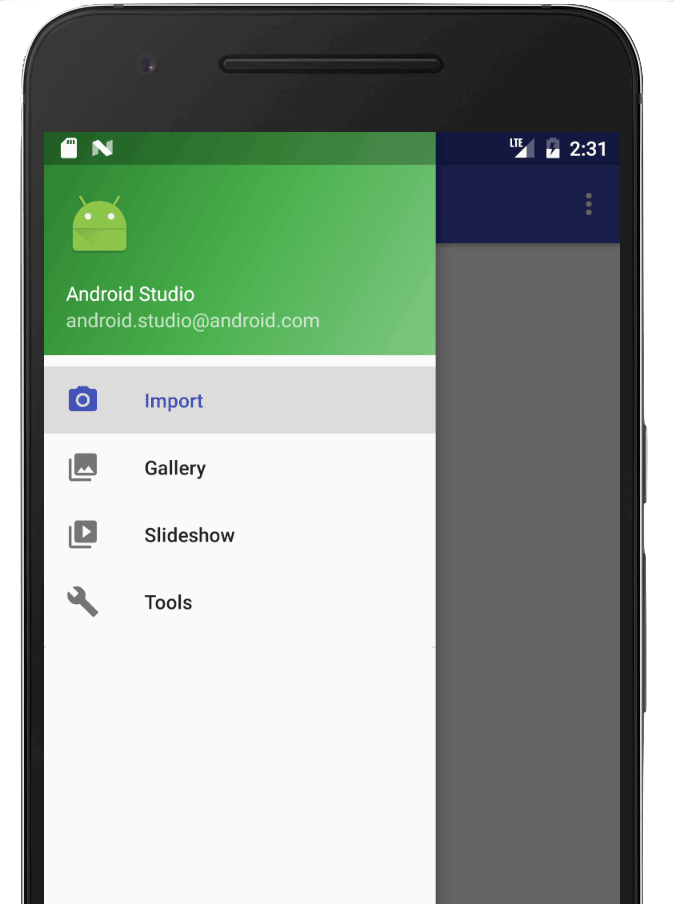
Figure 3. An open drawer displaying a navigation menu.
The drawer icon is displayed on all top-level destinations that use a DrawerLayout.
To add a navigation drawer:
1) first declare a DrawerLayout as the root view. Inside the DrawerLayout, add a layout for the main UI content and another view that contains the contents of the navigation drawer.
For example, the following layout uses a DrawerLayout with two child views: a NavHostFragment to contain the main content and a NavigationView for the contents of the navigation drawer.
<?xml version="1.0" encoding="utf-8"?>
<!-- Use DrawerLayout as root container for activity -->
<androidx.drawerlayout.widget.DrawerLayout xmlns:android="http://schemas.android.com/apk/res/android"
    xmlns:app="http://schemas.android.com/apk/res-auto"
    android:id="@+id/drawer_layout"
    android:layout_width="match_parent"
    android:layout_height="match_parent"
    android:fitsSystemWindows="true">

    <!-- Layout to contain contents of main body of screen (drawer will slide over this) -->
    <androidx.fragment.app.FragmentContainerView
        android:name="androidx.navigation.fragment.NavHostFragment"
        android:id="@+id/nav_host_fragment"
        android:layout_width="match_parent"
        android:layout_height="match_parent"
        app:defaultNavHost="true"
        app:navGraph="@navigation/nav_graph" />

    <!-- Container for contents of drawer - use NavigationView to make configuration easier -->
    <com.google.android.material.navigation.NavigationView
        android:id="@+id/nav_view"
        android:layout_width="wrap_content"
        android:layout_height="match_parent"
        android:layout_gravity="start"
        android:fitsSystemWindows="true" />

</androidx.drawerlayout.widget.DrawerLayout>
2) Next, connect the DrawerLayout to your navigation graph by passing it to AppBarConfiguration, as shown in the following example:
val appBarConfiguration = AppBarConfiguration(navController.graph, drawerLayout)
Note: When using NavigationUI, the top app bar helpers automatically transition between the drawer icon and the Up icon as the current destination changes. You don’t need to use ActionBarDrawerToggle.
3) Next, in your main activity class, call setupWithNavController() from your main activity’s onCreate() method, as shown below:
override fun onCreate(savedInstanceState: Bundle?) {
    setContentView(R.layout.activity_main)

    ...

    val navHostFragment =
        supportFragmentManager.findFragmentById(R.id.nav_host_fragment) as NavHostFragment
    val navController = navHostFragment.navController
    findViewById<NavigationView>(R.id.nav_view)
        .setupWithNavController(navController)
}
Note: Setting up the navigation drawer requires that you also set up your navigation graph and menu xml as described in Tie destinations to menu items.
Starting in Navigation 2.4.0-alpha01, the state of each menu item is saved and restored when you use setupWithNavController.
Bottom navigation
NavigationUI can also handle bottom navigation. When a user selects a menu item, the NavController calls onNavDestinationSelected() and automatically updates the selected item in the bottom navigation bar.
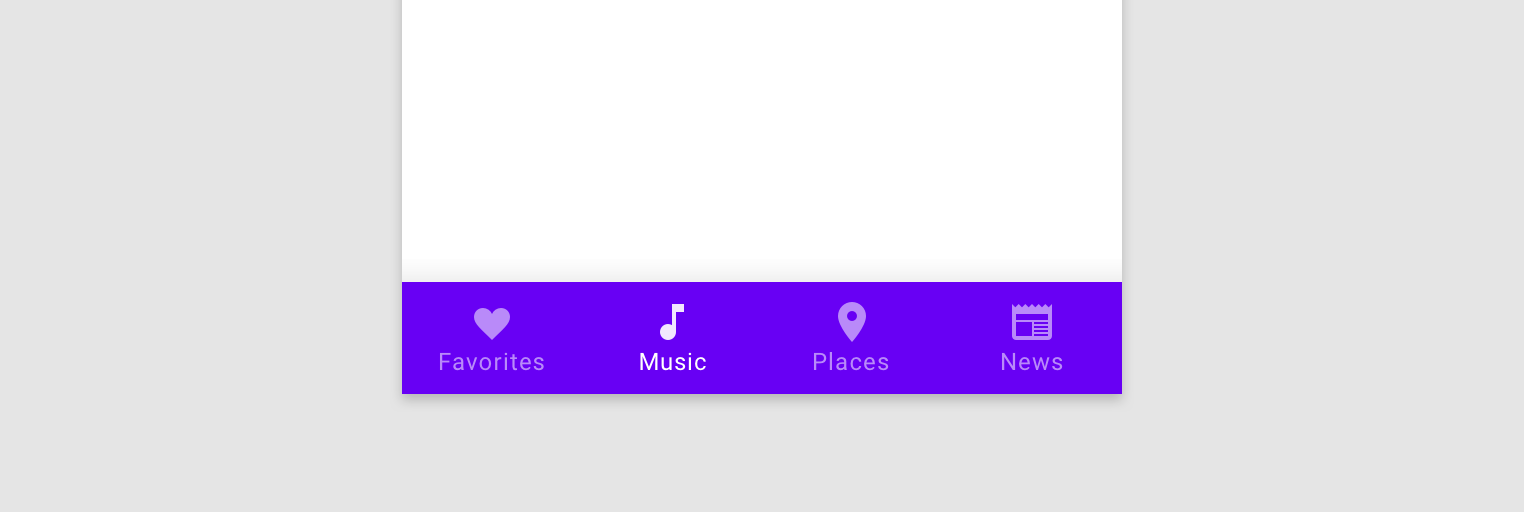
Figure 4. A bottom navigation bar.
To create a bottom navigation bar in your app:
1) first define the bar in your main activity, as shown below:
<LinearLayout>
    ...
    <androidx.fragment.app.FragmentContainerView
        android:id="@+id/nav_host_fragment"
        ... />
    <com.google.android.material.bottomnavigation.BottomNavigationView
        android:id="@+id/bottom_nav"
        app:menu="@menu/menu_bottom_nav" />
</LinearLayout>
2) Next, in your main activity class, call setupWithNavController() from your main activity’s onCreate() method, as shown below:
override fun onCreate(savedInstanceState: Bundle?) {
    setContentView(R.layout.activity_main)

    ...

    val navHostFragment =
        supportFragmentManager.findFragmentById(R.id.nav_host_fragment) as NavHostFragment
    val navController = navHostFragment.navController
    findViewById<BottomNavigationView>(R.id.bottom_nav)
        .setupWithNavController(navController)
}
Note: Setting up bottom navigation requires that you also set up your navigation graph and menu xml as described in Tie destinations to menu items.
Starting in Navigation 2.4.0-alpha01, the state of each menu item is saved and restored when you use setupWithNavController.
Listen for navigation events
Interacting with the NavController is the primary method for navigating between destinations. The NavController is responsible for replacing the contents of the NavHost with the new destination. In many cases, UI elements—such as a top app bar or other persistent navigation controls like a BottomNavigationBar—live outside of the NavHost and need to be updated as you navigate between destinations.
NavController offers an OnDestinationChangedListener interface that is called when the NavController’s current destination or its arguments change. A new listener can be registered via the addOnDestinationChangedListener() method. Note that when calling addOnDestinationChangedListener(), if the current destination exists, it’s immediately sent to your listener.
NavigationUI uses OnDestinationChangedListener to make these common UI components navigation-aware. Note, however, that you can also use OnDestinationChangedListener on its own to make any custom UI or business logic aware of navigation events.
As an example, you might have common UI elements that you intend to show in some areas of your app while hiding them in others. Using your own OnDestinationChangedListener, you can selectively show or hide these UI elements based on the target destination, as shown in the following example:
navController.addOnDestinationChangedListener { _, destination, _ ->
   if(destination.id == R.id.full_screen_destination) {
       toolbar.visibility = View.GONE
       bottomNavigationView.visibility = View.GONE
   } else {
       toolbar.visibility = View.VISIBLE
       bottomNavigationView.visibility = View.VISIBLE
   }
}
Argument-based listeners
As an alternative, you can also use arguments with default values within the navigation graph, which can be used by the appropriate UI controller to update its state. For example, rather than base the logic in the OnDestinationChangedListener on the destination ID as per the previous example, we can create an argument in the NavGraph:
<?xml version="1.0" encoding="utf-8"?>
<navigation xmlns:android="http://schemas.android.com/apk/res/android"
    xmlns:app="http://schemas.android.com/apk/res-auto"
    android:id="@+id/navigation\_graph"
    app:startDestination="@id/fragmentOne">
    <fragment
        android:id="@+id/fragmentOne"
        android:name="com.example.android.navigation.FragmentOne"
        android:label="FragmentOne">
        <action
            android:id="@+id/action\_fragmentOne\_to\_fragmentTwo"
            app:destination="@id/fragmentTwo" />
    </fragment>
    <fragment
        android:id="@+id/fragmentTwo"
        android:name="com.example.android.navigation.FragmentTwo"
        android:label="FragmentTwo">
        <argument
            android:name="ShowAppBar"
            android:defaultValue="true" />
    </fragment>
</navigation>
This argument isn’t used when navigating to the destination, but rather as a way to attach additional information to the destination by using the defaultValue. In this case, the value indicates whether the app bar should be shown when on this destination.
We can now add an OnDestinationChangedListener in the Activity:
navController.addOnDestinationChangedListener { _, _, arguments ->
    appBar.isVisible = arguments?.getBoolean("ShowAppBar", false) == true
}
The NavController invokes this callback whenever the navigation destination changes. The Activity can now update the state or visibility of the UI components that it owns based upon the arguments received in the callback.
One advantage of this approach is that the Activity sees only the arguments in the navigation graph and doesn’t know individual Fragment roles and responsibilities. Similarly, the individual fragments do not know about the containing Activity and the UI components that it owns.
References:
- https://developer.android.com/guide/navigation/integrations/ui
- https://developer.android.com/develop/ui/views/components/appbar
- https://developer.android.com/develop/ui/views/components/appbar/setting-up